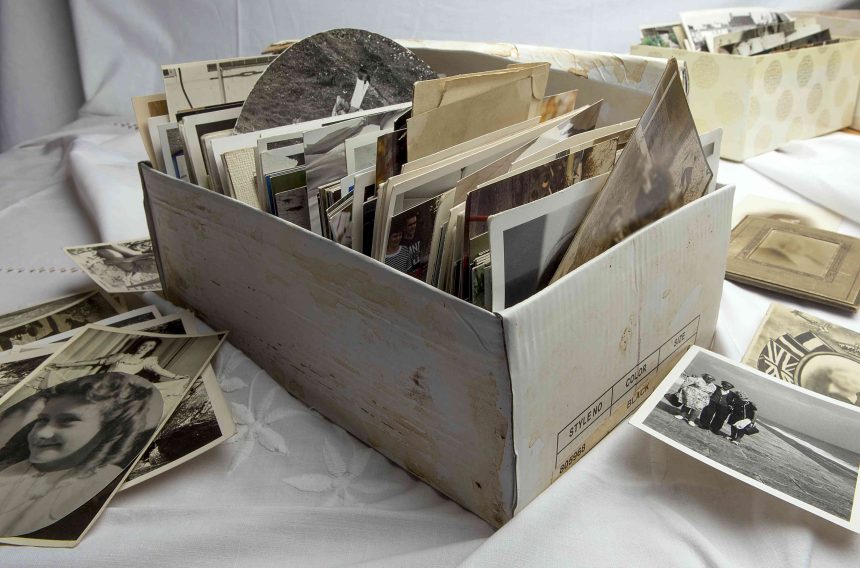
Even though nowadays most of our photos are stored on our phones, there are unique physical images of family members and ancestors that probably won’t ever be digitized. Since there’s been such a huge shift in photo printing over the last decade, this can lead to some confusion over how best to store physical copies for longevity.
To help demystify the process, we turned to a few professional organizers for their tips for preserving photos.
Meet the Expert
- Liora Seltzer is a certified KonMari Method professional organizer and founder of It’s What U Keep organizing blog.
- Diane N. Quintana is a professional organizer and founder of DNQ Solutions organizing company.
- Laura Ascher is a DIY and lifestyle influencer, and the founder of Our Oily House natural home blog.
Set a Specific Time and Pace Yourself
Westend61 / Getty Images
Sorting through years of printed photos can be an overwhelming task, but it’s a necessary step in preserving the ones that matter most. The best thing to do is set aside a manageable amount of time, ideally across a few days.
“It’s not a project that can be done in one sitting,” says professional organizer Liora Seltzer. “So pace yourself and make sure you give yourself some downtime after sorting.”
Want more cleaning and organizing tips? Sign up for our free daily newsletter for the latest hacks, expert advice, and more!
Set a Goal or Intention for Your Photos
Whether you’re trying to pare down and make more space or you want to create a new photo album, Seltzer suggests setting a goal for your photos before you get started. This will help you best determine what can be saved and what should be tossed.
Remove All Duplicates
Nico De Pasquale Photography / Getty Images
Once you’ve decided when and how you’ll sort through your photos, professional organizer Diane N. Quintana says the next step is to look for duplicates or near-duplicates.
“Keep one and toss the rest,” she says.
The same goes for anything blurry or too dark to see. Don’t toss something you might regret, but if there’s no point in saving it (and that does include having a duplicate), it can go.
Protect Against Damage
DIY influencer Laura Ascher says the three biggest threats to printed photos are sunlight, temperature, and moisture. To help avoid damage from these elements, she adds silica gel packets to her photo storage boxes, and avoids keeping photos in the basement, garage, or attic.
“While that may be convenient, those locations are notorious for fluctuating temperatures and high humidity, which can lead to discoloration, warped photos, and fading,” Ascher says.
For the same reasons, Seltzer says she prefers waterproof bins. But if you must store your photos in a less-than-desirable spot, avoid placing the bins or boxes directly on the floor.
“There are many stories of people losing all of their photos because they were in cardboard boxes that did not survive a flood or pipe burst,” says Seltzer.
Use Acid Free Photo Boxes and Albums
ISO3000 / Getty Images
If you don’t need something as large as a watertight bin for your photos, or you want added protection, Quintana says acid-free boxes are a must.
“These boxes are specifically made for keeping photos safe,” she says.
Ascher agrees, and says along with acid-free boxes, she also prefers acid-free albums.
“I find that simple acid-free albums, when well-labeled, work well and are often budget-friendly,” she says.
These boxes and albums are usually stackable, making them easy to store in closets or cabinets, as well as within watertight bins.
Label Everything Correctly
However you decide to store and save your photos, it’s key to label everything. Be sure to label the outside of your storage bins or boxes, along with the backs of the photos.
“Use a pencil to label the back of the photo with all information about the picture,” says Quintana. “Who is featured in the picture, where it was taken, and the date.”
Keep a Digital Copy
Gary Yeowell / The Spruce
Now is a great time to scan your photos and convert them into digital copies so they can be truly preserved. This helps keep your photos safe and gives you the option to make a beautiful photo book in the future.
Repeat This Practice Annually
To avoid another pile-up of printed photos, Ascher suggests repeating this process annually. You can even apply it to your digitally stored photos.
“Aside from being the perfect excuse to look back on old memories, it’s a great opportunity to cull duplicates, add labels, and ensure your system is still working for you,” she says.
As your process develops, you can also add a high-quality scanner, external hard drive, and cloud storage to keep your memories preserved in multiple formats.


