“], “filter”: { “nextExceptions”: “img, blockquote, div”, “nextContainsExceptions”: “img, blockquote, a.btn, a.o-button”} }”>
Heading out the door? Read this article on the new Outside+ app available now on iOS devices for members!
>”,”name”:”in-content-cta”,”type”:”link”}}”>Download the app.
Hip openers have intrigued Yogic Spirits owner Viresh Nidanchi since he saw a sannyasi (a religious ascetic) teaching yoga in his birth country of India when he was a young child. “He was doing headstand with the splits in a public park and I became mesmerized,” recalls Nidanchi. “It was like a discovery for me. I wondered if it was possible for me to do this.”
He started practicing with the teacher, and since then, yoga has been a part of his life. Now a teacher himself, Nidanchi continues to explore movement in the manner of his instructor by dynamically entering hip-opening poses. He explains this approach helps students access poses more safely and explore them more deeply.
“Hip flexibility is essential not only for injury prevention and maintaining a balanced, healthy body but also for improving overall posture,” says Nidanchi. “Beyond the physical benefits, hip openers help release emotional tension, foster creativity, and support a positive mindset.”
The theory that hip openers unleash emotions and creativity draws on two of our most foundational chakras: Our root chakra (muladhara), which is linked to feelings of rootedness and safety, and our sacral chakra (swadisthana), which is tied to our creativity.
But the most important component of any pose, at least for Nidanchi? They must be fun.
7 Unexpected Approaches to Hip Openers
In the following poses as well as on Instagram, Nidanchi’s dynamic ways of coming in and out of the postures help bring some unexpected enthusiasm—and intensified hip opening—to otherwise traditional shapes. Nidanchi is also a big fan of incorporating arm variations into hip openers. “We are doing hip opening exercises, but it doesn’t mean other body parts aren’t involved,” he says.
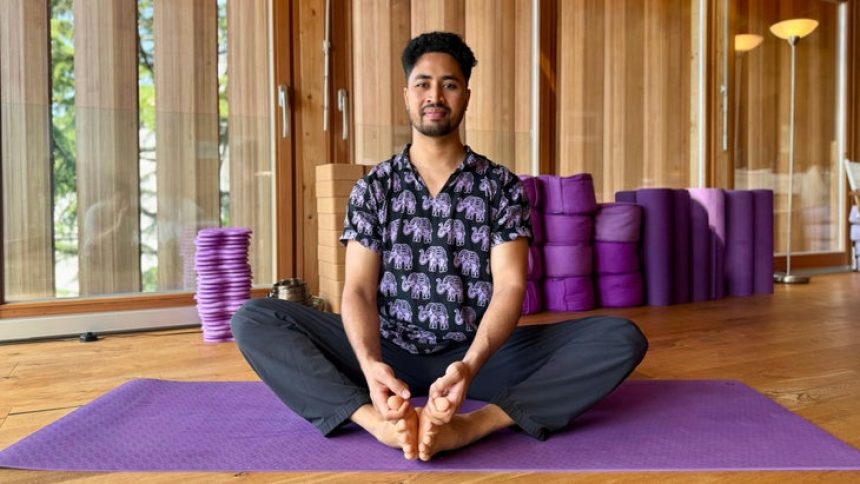
1. Bound Angle
Nidanchi prefers to refer to Baddha Konasana as Butterfly Pose, which makes sense given his version. “I like to do the ‘flapping’ of the knees up and down first,” says Nidanchi. “It activates your muscles and gets you warm, making it much easier to get into the pose.”
How to: Start in a comfortable seated position. Bend your knees, bring your feet together, and catch hold of your big toes with your peace fingers. Keep as much distance as necessary between your body and your feet. Roll your shoulders back and down. Start to flap your legs up and down like wings. If possible, try to tap your legs to the ground with each lowering. Do this for about 30 seconds.
On an exhalation, lengthen your spine and fold forward. If comfortable, you can use your peace fingers to pull yourself lower. Protect your spine by ensuring your back is straight and feel free to use your elbows to press your thighs down if they are in contact. Stay here for a few breaths. With your final inhalation, rise slowly up.
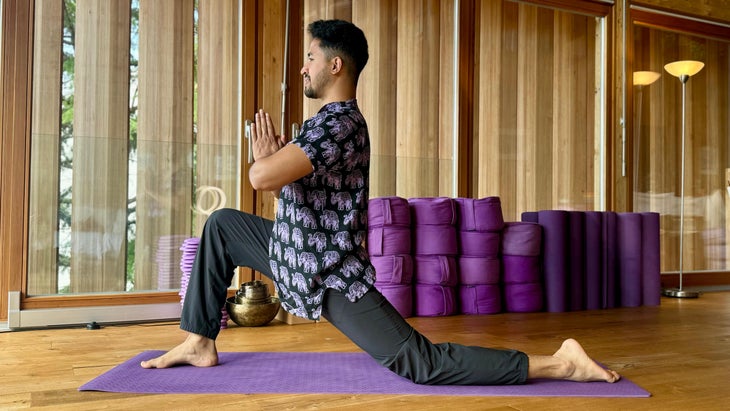
2. Low Lunge
This unique entry into Low Lunge asks you to start in Warrior 1 and then move into High Lunge before lowering into Low Lunge (Anjaneyasana).
How to: Stand at the top of your mat with your feet together. Step your right foot back at an angle, stepping the foot further out to the side and wider than your hips as needed to allow your hips to face squarely forward. Raise your hands alongside your head and try to bring your palms together. As you exhale, bend into your left knee and try to bring your thigh parallel to the mat with your knee positioned over your second and third toes. Lift your back heel off the ground and point your toes forward as you come into a High Lunge. Then exhale, release your back knee to the mat, and rest your back toes on the mat, arriving in Low Lunge. Hold here for a few breaths. When you’re ready, place your palms on the mat, tuck your toes, and step back to the top of the mat. Repeat on the other side.
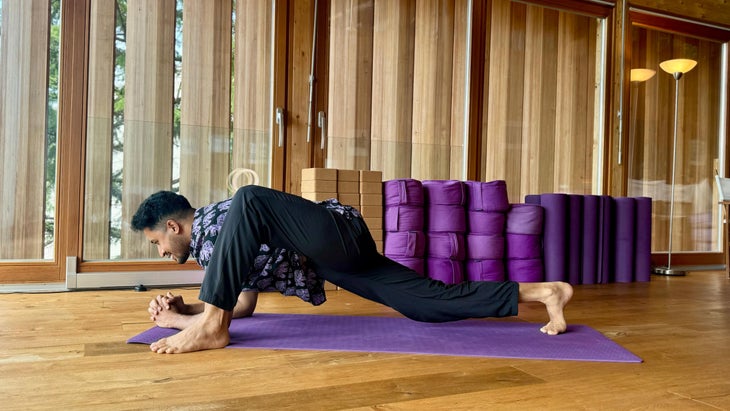
3. Lizard Pose
Nidanchi notes that this challenging shape requires considerable flexibility in the hips. He prefers coming into Lizard Pose (Utthan Pristhasana) from a Low Lunge after practicing dynamic stretching. “Sometimes the reason people can’t go all the way to the floor in this pose is because other parts of the body are tight,” he says. He encourages using a block beneath the forearms for support.
How to: Start in Downward-Facing Dog. Take your right foot to the sky before you step forward and place your foot outside your right hand. Gently bounce your back knee up and down 10 times, moving your knee closer to the floor on your exhalations and straightening your left on your inhalations. After your final inhalation, lower your back knee to the mat. Bring your forearms to the mat or blocks and lean your chest toward the floor. Stay here for 5 breaths. Press your arms straight, lift your back knee, and step back to Downward-Facing Dog. Repeat on the other side.
4. Pigeon Pose Variation
There are many versions of the hip opener known as Pigeon (Eka Pada Rajakapotasana). Nidanchi’s preferred take on the pose includes dynamic arms. ”When I do these fun variations, it puts more stretch on the hips while opening and stretching my back muscles and shoulders,” he says.
How to: Start in Downward-Facing Dog. Raise your right foot toward the sky and bring your right knee toward your forehead before lowering your shin to rest in between your palms. Walk your hands back so your chest is upright. Roll your shoulders back and down.
Inhale and bring your hands to your heart center. Exhale and now bend your elbows to the sides into a cactus shape. Inhale and straighten them. Do this a few times.
On your next exhalation, lower your chest forward toward the mat and attempt to touch your forehead to the floor. Remain here for 5 breaths. On an inhalation, lift your chest upright without using your hands, keeping your arms in line with your ears. Lower your hands and gently switch sides.
Note from Yoga Journal: If bringing your front hip to the floor is challenging, consider placing a rolled blanket or bolster underneath.
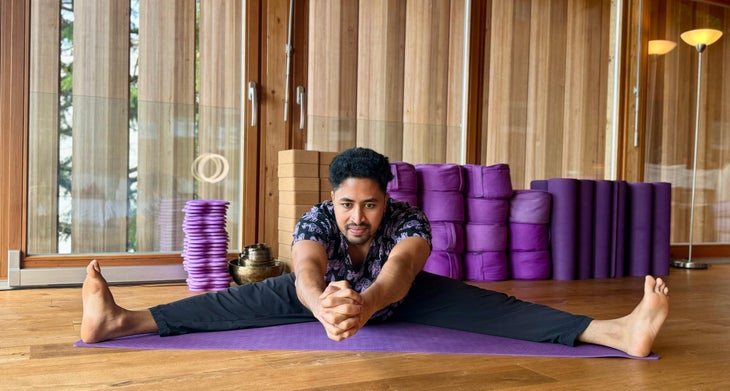
5. Wide-Angle Seated Forward Pose Variation
This posture is a classic. Nidanchi incorporates a few twists (in some cases, literally) to the Seated Forward Bend (Upavistha Konasana) to set students up for the deepest possible stretch.
How to: Start in a seated position. Spread your legs as wide as possible. Reach your arms in front of you and interlace your fingers. Now, make some big circles with your upper body. Start by exhaling and leaning to the right, with your arms overhead. Then lean forward. Keep reaching your arms overhead and palms to the front.hen lean over to your left and back around. Make a few big circles like this. Now, switch directions.
On an inhalation, raise your hands to the sky and turn your chest toward your right foot. Fold over your leg and stay for a few breaths. Inhale, coming back up to center and reaching your arms to the sky. Exhale and turn toward your left leg. Fold over your leg and stay for a few breaths before coming back up.
Now, take the side bend. Lean sideways toward your right foot. Bend your right elbow and rest it on the floor. Reach your left arm overhead and either keep it there or reach forward to grab your toes. Stay for a few breaths. Inhale, lift your torso upright and now side bend left and repeat the position.
Finally, come back to center. Exhale, lower your arms and place your hands on the floor. Bend your elbows and bounce a few times before walking your fingers as far as possible and folding. Hold for 8 breaths. Slowly walk your hands back. Come back up with your torso and bounce your knees before bringing your legs together.
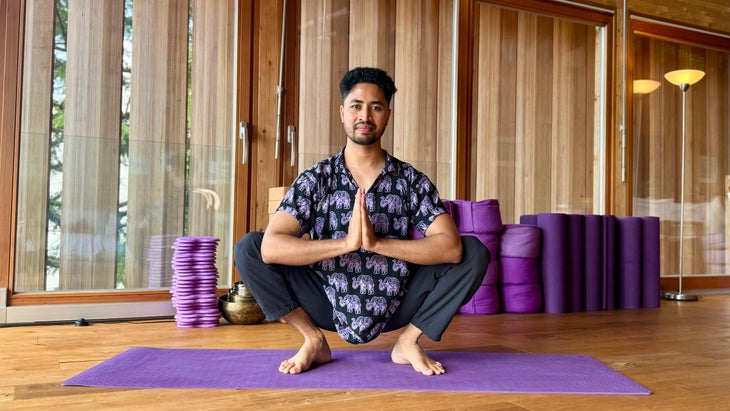
6. Squat
For those who have trouble lowering the foot fully in Squat (Malasana), Nidanchi recommends balancing your heels on a block. Once in the pose, he encourages students to play with the arms, opening them wide, twisting to one side, or wrapping.
How to: Start standing with feet a little more than hip-width apart. Point your toes outward, with your heels facing in. Inhale, reaching your arms up overhead and pressing your palms together. On your exhalation, bring your hands to heart center and squat down so your bottom is hovering between your heels. Lift your heels or place them on blocks, balancing with your hands together or your palms planted on the ground. Use your elbows to open your legs and try to keep your back straight. Stay for 5 breaths or play with different variations of the arms. After your last breath, place your palms on the ground and stand up.

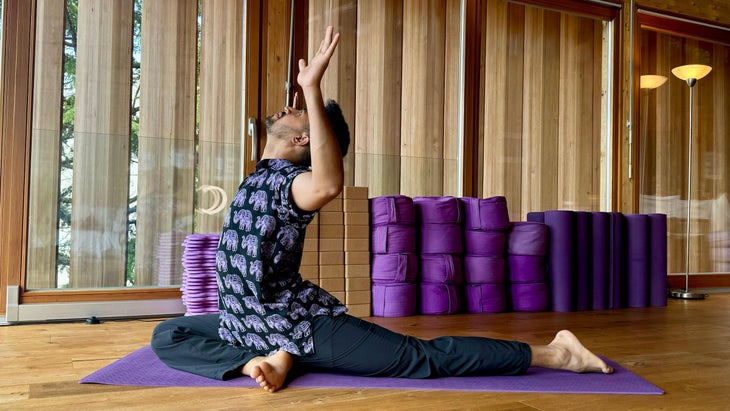
7. Splits
Nidanchi’s method of entering Splits (Hanumanasana) makes space for tight hips. After all, this pose isn’t only a hip opener in the back leg. The hamstring stretch required of the front leg also requires flexibility in the hip socket.
How to: Start by putting on a pair of socks. Step into Downward-Facing Dog. Raise your right foot to the sky and step your foot forward and near your right hand. Lower your back knee to the mat. Begin walking or inching your front foot forward off the mat, step by step. Slowly slide your front leg forward and back a few times, warming up the hip. If you are stable, try bringing your arms up and bending the elbows on an exhalation. Do this a few times. Come back to Downward Dog and repeat on your other side.
Practice with Viresh Nidanchi online at Yoke Yoga or in person at his studio Yogic Spirits in Vevey, Switzerland.