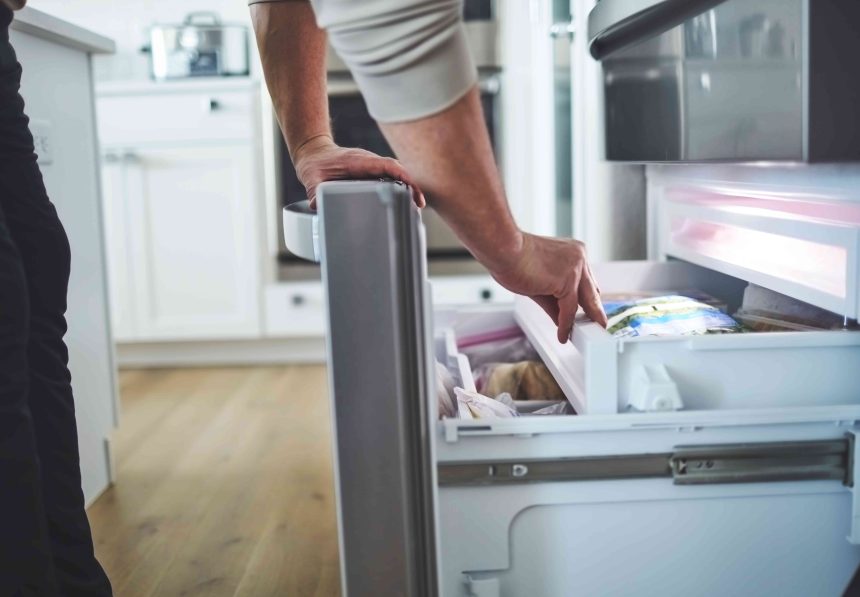
The freezer is a wonderful place for stashing meals you’ve prepped beforehand or store-bought goods you’re saving for a dinner pinch. But, without proper storage, you know that this small space can quickly turn into a disheveled space.
Like organizing the refrigerator, setting up a freezer system is quite easy. The key is fining the right methods that work for your lifestyle and freezer size and playing with the arrangement of your items. Luckily, if you don’t know where to start, we spoke to an organization expert for tried-and-true tips when it comes to freezer organization ideas.
Use Bins & Containers
First and foremost, when following any freezer organization tip, you’ll almost always need helpful bins and containers, even when grouping together store-bought items.
“We love to utilize organizational products and our go-to is the Home Edit fridge and freezer collection,” Lee says. “Organizational products creates boundaries that help keep your family on the same page. When you begin organizing your freezer, we recommend overbuying to ensure you like the way everything fits.”
The good news is that almost any material can go in the freezer from plastic, freezer-safe glass, to aluminum foil and even plastic wrap. Containers are great for holding homemade leftovers you want to freeze while the bins are handy for grouping multiple containers or packages together without the individual packages lying around the shelves.
Store By Trends
Once you have your bins ready to go, Lee says one of her freezer organization ideas she gives clients is storing by trends you notice with the items you have.
“First, we want to identify themes and trends. As categories emerge, place like items together in bins to begin editing. For example, place together all of your frozen vegetables, desserts, etc.”
Designate each bin you have to a category or type of food and then group each package that fits the trend in one bin. For items you and your family grab the most, place that bin on the top shelf to keep it visible and easily seen. Label the front of each bin with the name of its category or type of food for extra organization practices.
Group By Expiration Dates
Freezer burn is real. Although the time it takes for food to develop freezer burn varies upon food type, the average time length for it starts is at least three months of being in your freezer.
With that in mind, it’s safe to say grouping your freezer by expiration dates of your homemade and store-bought food is great idea so you know to eat from that selection first.
When you’re taking inventory of your current freezer items and organizing by dates, Lee recommends grouping the first-to-go items within eyesight.
“Next, we want to understand the anatomy of the freezer and arrange your shelves strategically,” she says. “Your top shelf should hold items that are easy to see and easy to choose, and items approaching their “best buy date” should also be placed here. This helps prevent food waste by ensuring your visibility on these items. The middle shelves should hold your frozen vegetables, or meals and your bottom shelves should be any breads, pancakes, or frozen meats.”
An extra tip Lee shared with us to assist with not throwing out so many expired foods is to regularly take inventory of what you already have before you go shopping.
“Before your weekly grocery shopping, take some time to evaluate what you already have in your freezer. A best practice is to remove expired food and clean up any spills in addition to wiping out your meat and defrost bins weekly. Creating daily, weekly, and monthly routines will allow you ownership over your space- and your time!”
Label Homemade Items
Part of beating the freezer burn phase for homemade food is to label the package. Choose between labeling the day the food was prepared or an “eat by” date at least three months out. Not only does this tactic help keep you in the know of when you need to eat your food, but it also tells you what is in your freezer.
Other than the date, label the ingredients or meal you’re freezing so you know what’s in each package or container. Then, if you’re using bins, put the package or container in the corresponding bin.
When packaging homemade food into packages to freeze, make sure the lid fits snug and tight to prevent oxygen and moisture from getting in and drying out the food.
Stash Vertically
Since freezers offer far less room than refrigerators, sometimes the best organization tips is optimizing the awkward space. If you’re someone who has a lot of prepackaged foods (frozen pizza, anyone?), arranging your boxes vertically is a great way to keep your freezer organized and less of a frigid disaster.
This tip also works with make-ahead meals if you put them in heavy-duty zipper plastic bags and sit them upright or place them in slender plastic bins to keep your shelves scatter-free.